With evon Smart Home, you have brought the most up-to-date home automation system into your home. We want to help you with the planning so that your project is easily implemented. Before you dedicate yourself to the detailed information in the documentation, we would like to give you a rough overview of the functionality in an evon Smart Home system.
Depending on what you intend to control, you will need different evon Smart Home modules (light module, blinds module …); according to the application or function, there is a range of different modules you can choose from. The autonomous evon Smart Home modules provide you with centralized functions such as “All Lights Off”. The complete range of control functionality is only available with the CPU module, which enables the configuration and control to be done via smartphone, tablet or PC.
The modules are mounted in one or more cabinets and need to be connected and wired differently to conventional electrical installations. The electrical consumers are connected to the module outputs and one or more switches are connected to the inputs. In contrast to a conventional electrical installation, the switches are not used to directly switch 230V to a consumer, but to control an evon Smart Home module. Since the laying of empty conduit and the laying of cables occurs at a different time to the installation of the consumer unit and the commissioning of the controls, it is extremely important that the cabling for electrical consumers and switches is planned in detail. Hence the first part of our documentation details with the necessary steps to do this.
Hardwarekonzept
Abhängig von den Anforderungen an die Haussteuerung kommen unterschiedliche evon Smart Home Module wie Lichtmodule, Jalousiemodule usw. zum Einsatz. Die zentrale Basis bildet dabei der evon Smart Home Controller.
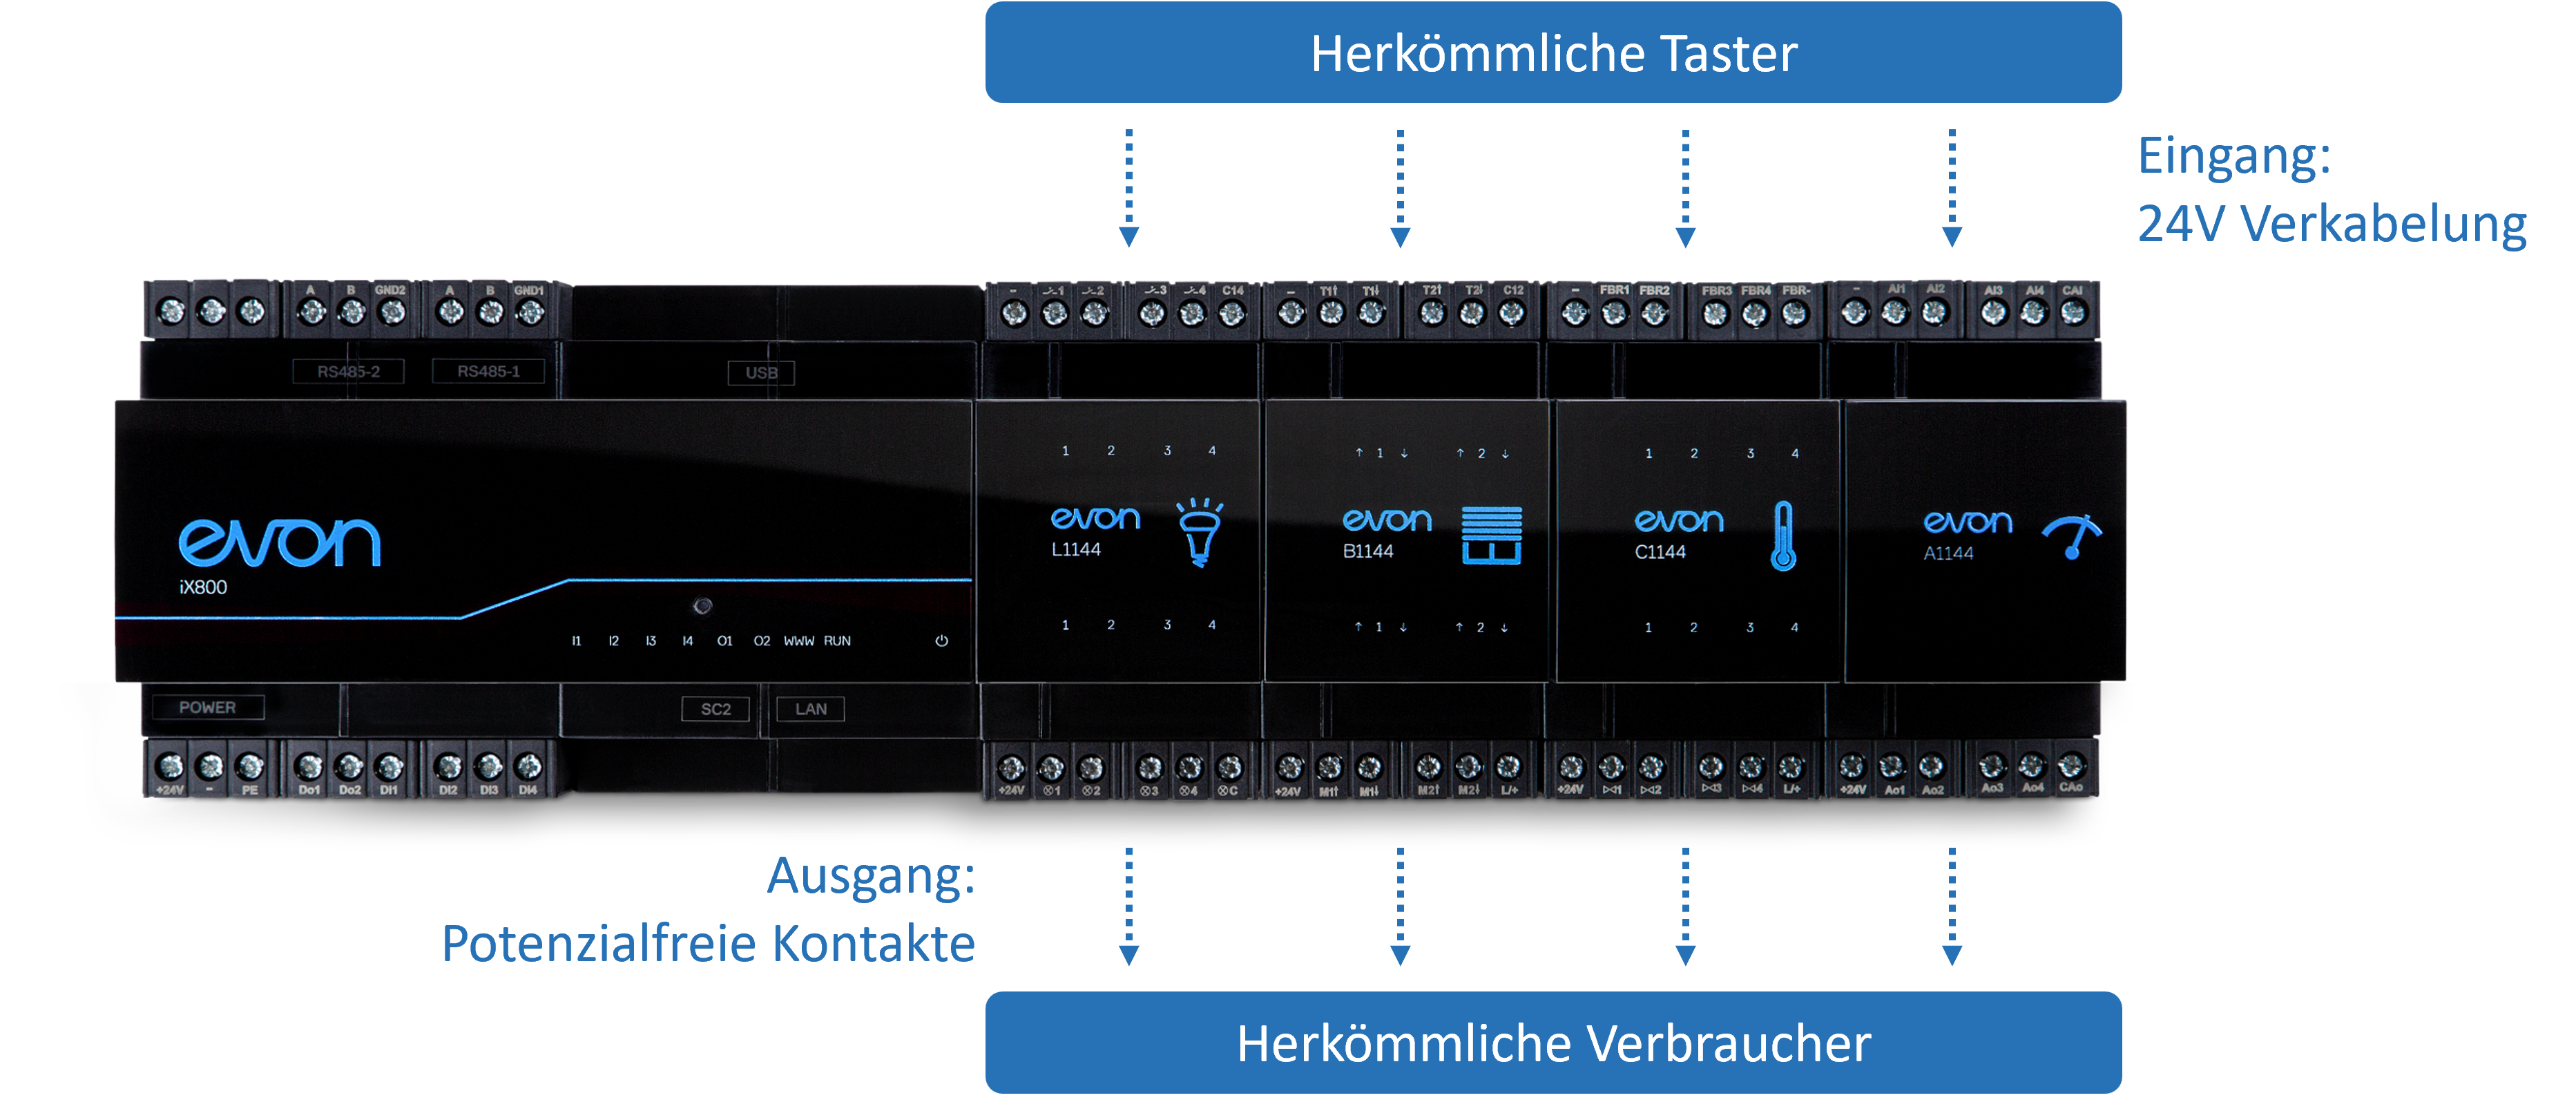
Die Module werden in einem oder mehreren Schaltschränken installiert und zentral verkabelt. Dabei gilt:
An den Ausgängen der Module werden die Verbraucher angeschlossen.
An den Eingängen werden Taster, Bewegungsmelder, Raumfühler usw. angeschlossen.
Da die Leerverrohrung und das Einziehen der Kabel häufig nicht zeitgleich mit dem Aufbau des Schaltschranks und der Inbetriebnahme der Steuerung erfolgen, ist eine sorgfältige Planung der Verkabelung für Verbraucher und Taster besonders wichtig.
Dieser Aufbau aus einzelnen Funktionsmodulen und einem zentralen Controller ist patentiert und bietet drei wesentliche Vorteile:
Einfach:
Das System lässt sich vollständig ohne Programmieraufwand konfigurieren. Nach der Installation stehen die grundlegenden Funktionen des Smart Homes sofort zur Verfügung.
Sicher:
Durch die integrierte Autarkfunktion bleiben wichtige Basisfunktionen wie das Ein- und Ausschalten von Licht sowie das Hoch- und Herunterfahren von Jalousien auch bei einem Systemausfall weiterhin verfügbar.
Unabhängig:
evon Smart Home ist ein offenes System und ermöglicht die Einbindung herstellerunabhängiger Hardwarekomponenten.
Eine Übersicht aller Produkte ist auf der Website oder im Partnerportal verfügbar.
Interface
Visualization of your evon Smart Home system enables you to control all functions in your home and adjust all necessary settings. There are a few simple concepts that we would like to describe here.
Startbildschirm
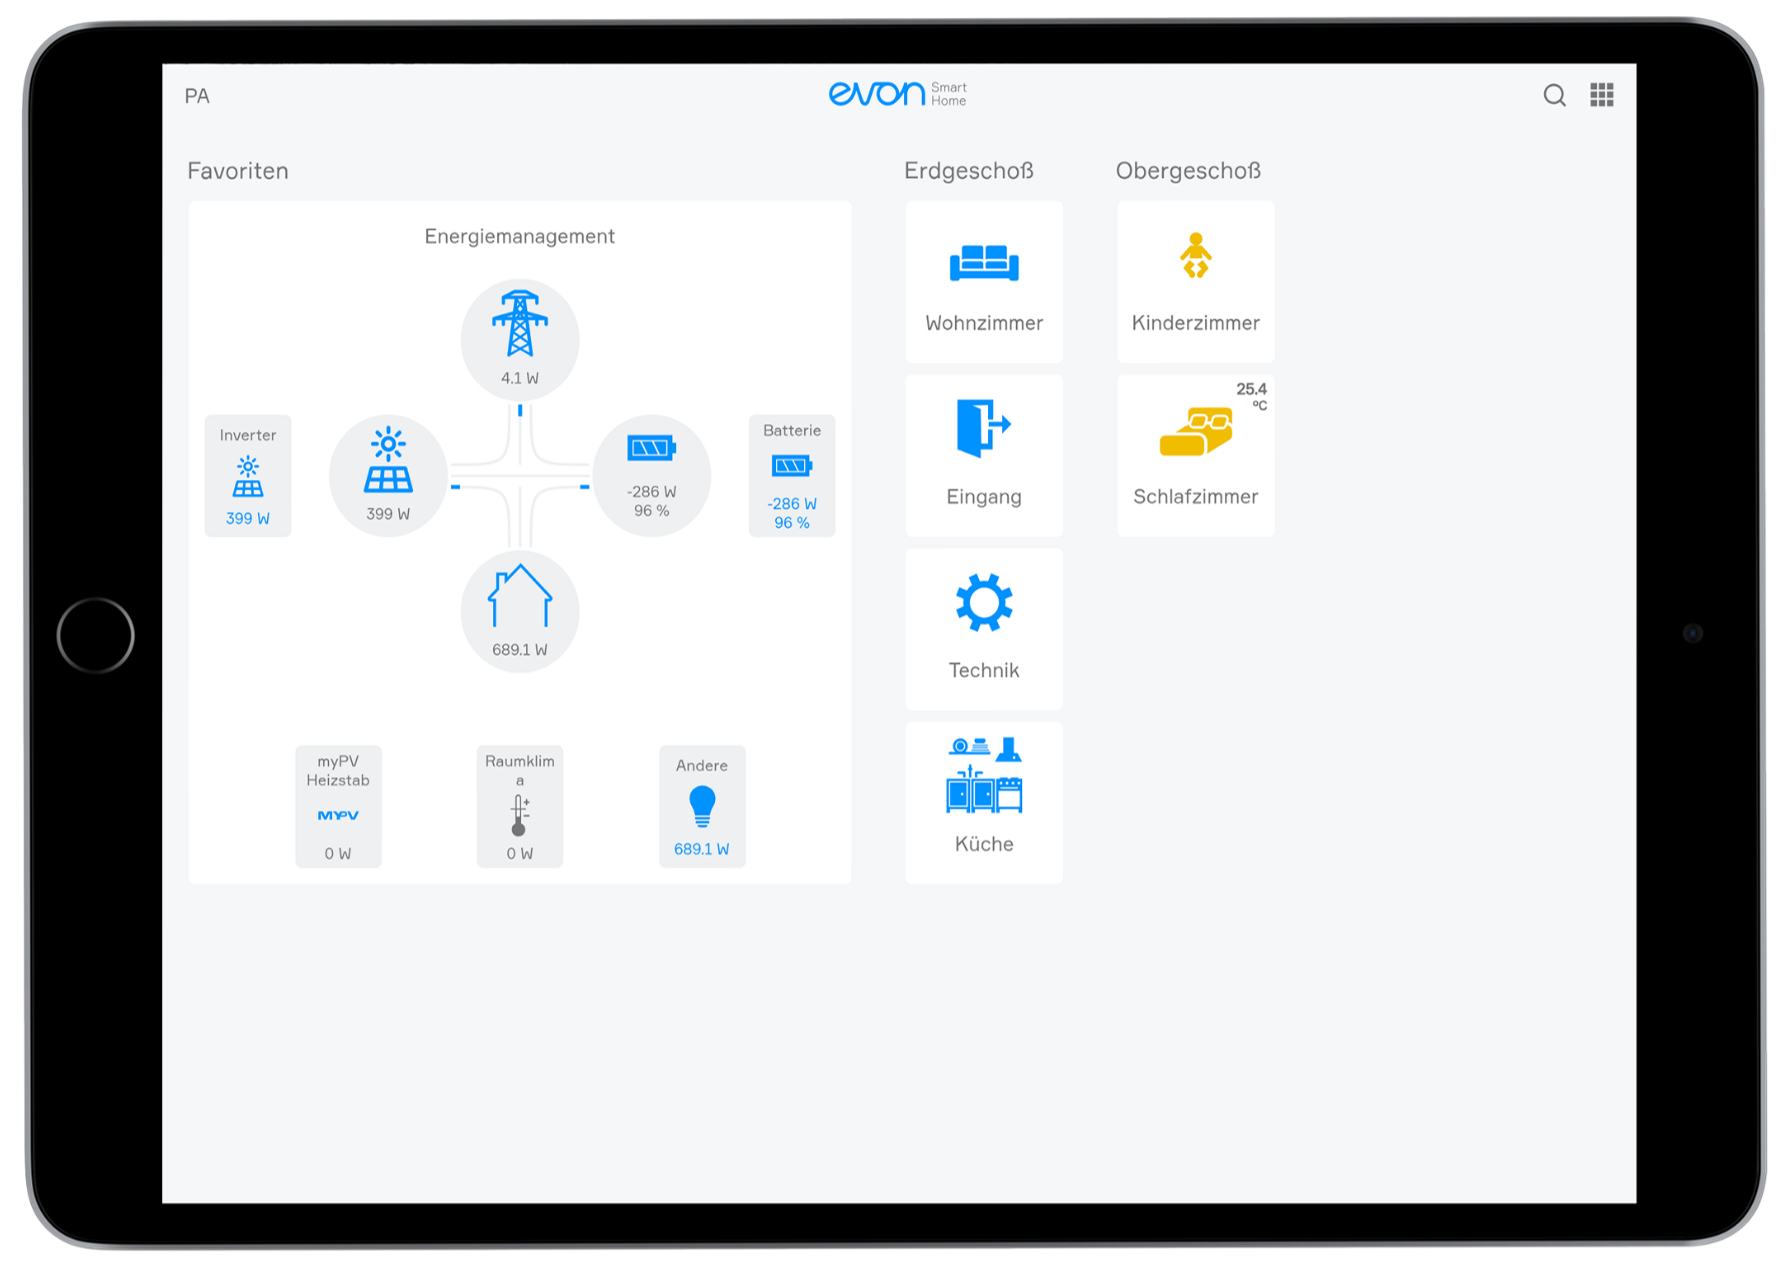
Die zwei wesentlichen Bestandteile des Startbildschirms sind:
Favoritenbereich: Dieser kann individuell für jeden Benutzer gestaltet werden. Unterschiedlichste Funktionen oder Dashboards können angeheftet werden, um schnellen Zugriff zu ermöglichen.
Bereiche und Räume: Diese werden während der Inbetriebnahme definiert. Jeder Bereich bzw. Raum enthält alle Funktionen, die ihm zugeordnet sind.
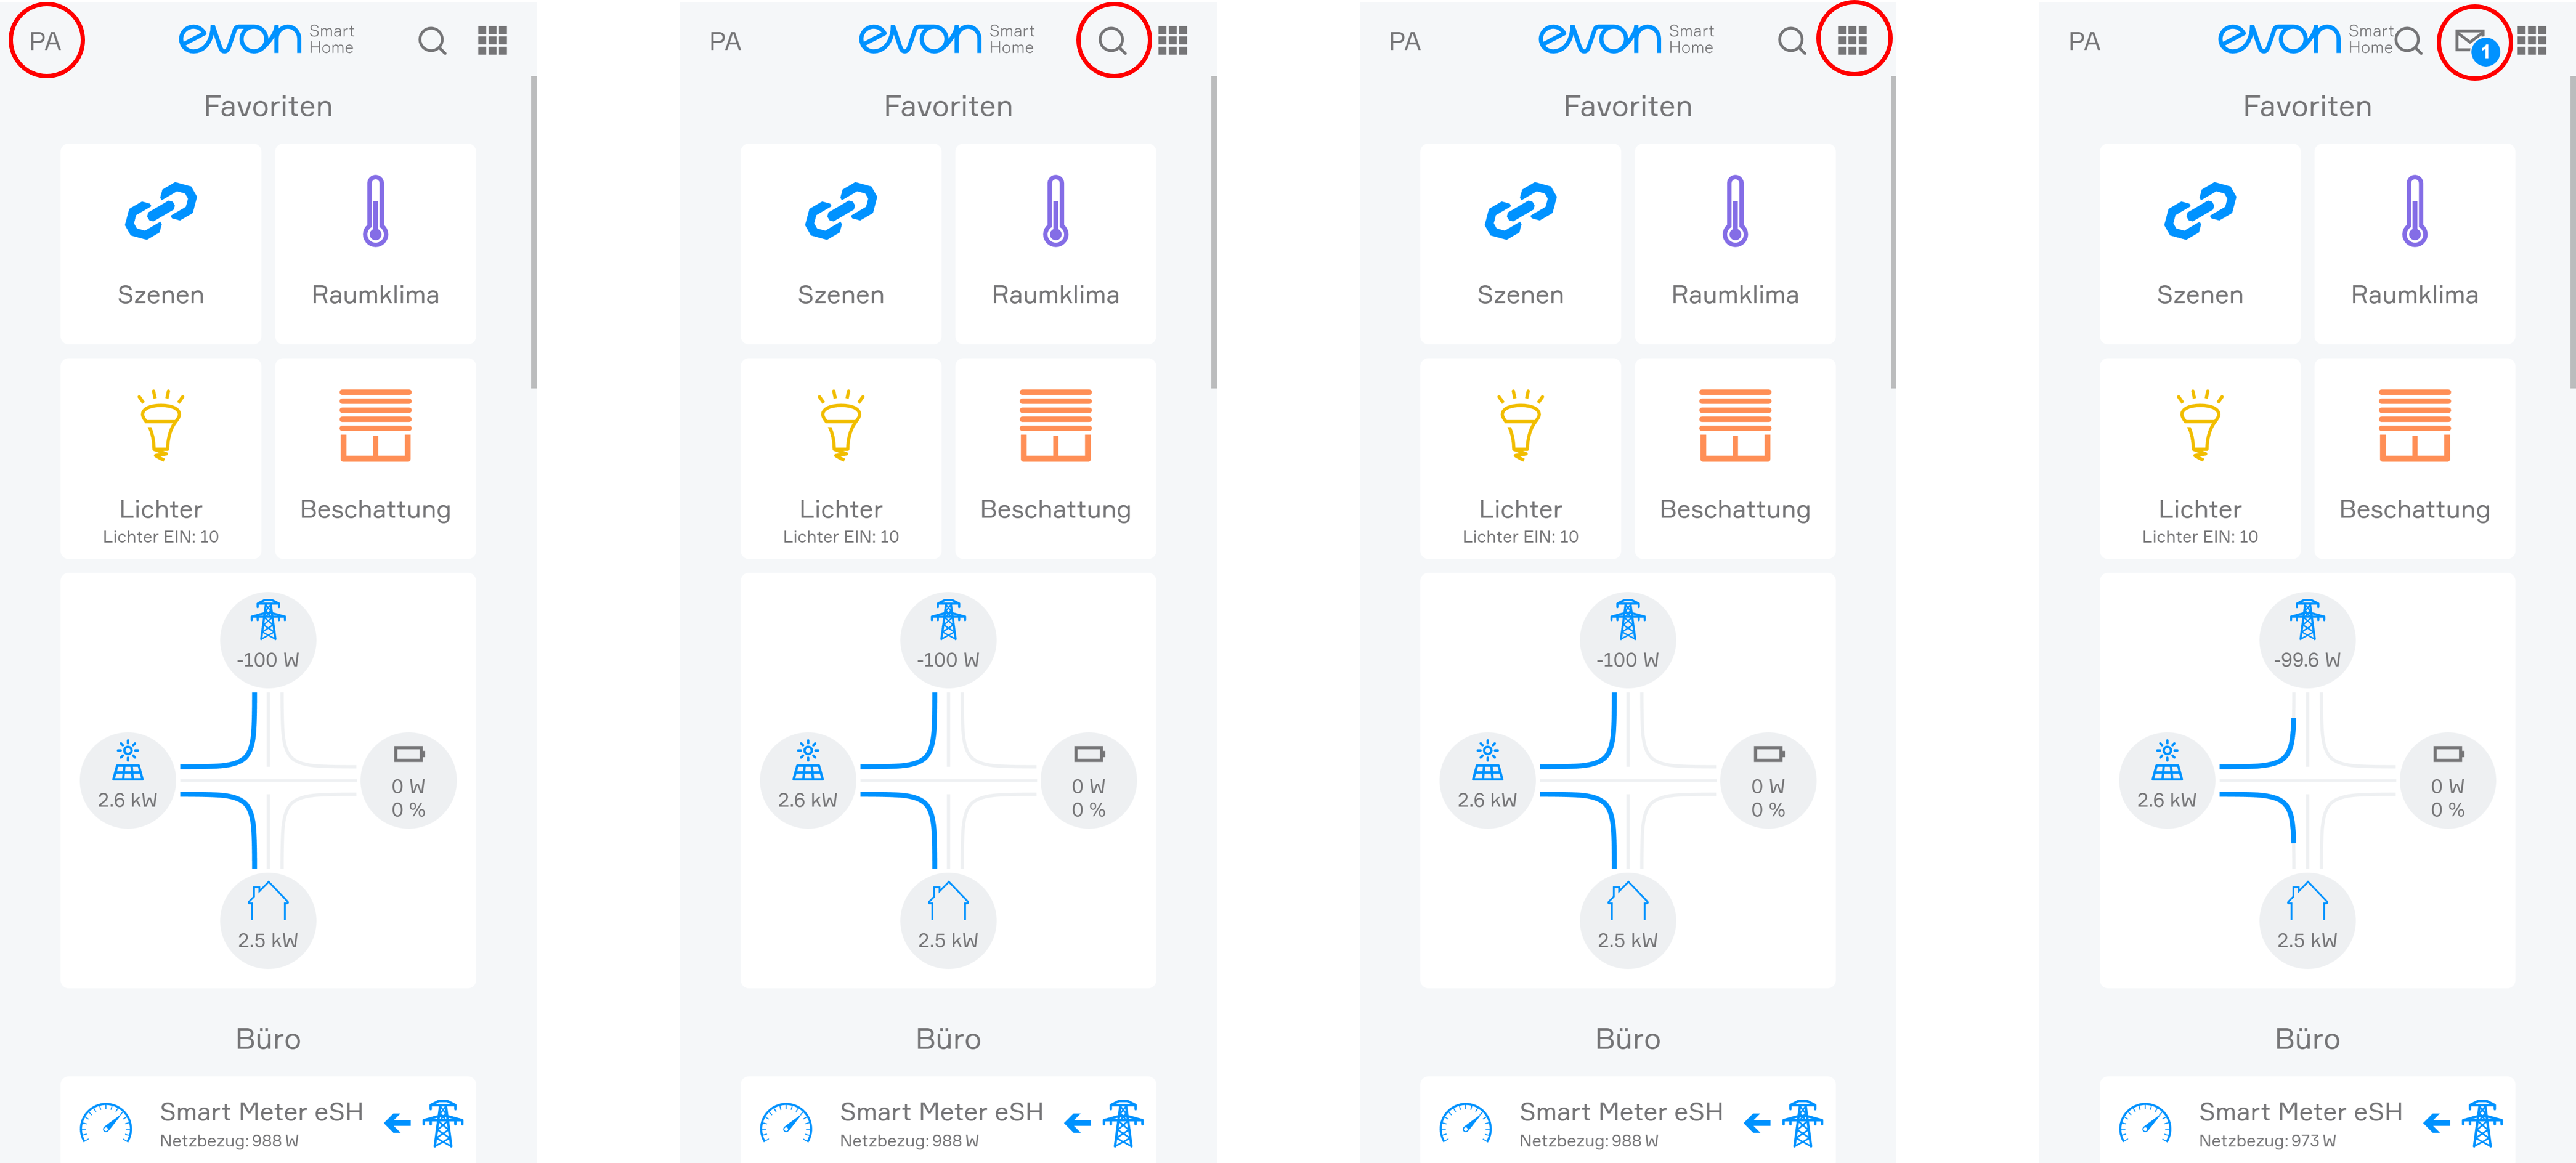
Darüber hinaus bietet der Startbildschirm direkten Zugang zu den Funktionen: Benutzer - Suche - Alle Apps - Meldungen
All Apps
A single click on the symbol (top right) opens all apps. This shows you all available apps. If you don’t want “all apps” open all the time, you can put frequently used apps into your favourites, as follows.
Usage
Every app contains different views and representations that are used for opening, operating or changing settings.
App
This is the basic representation of every app in the system. A single click/press on this display opens the app view and its functions can be used and/or changed.
App Interface
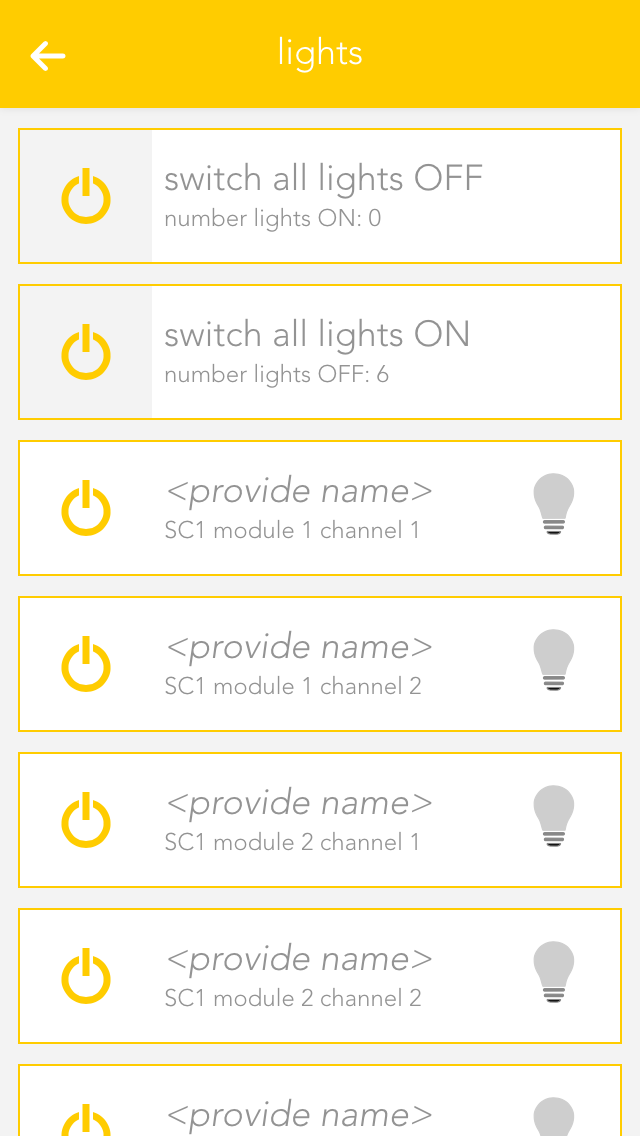
As long as you have an app open, you can also open its view. This shows you all content and functions that are available to you. In the case of the light app, the items displayed include all connected lights and the group functions.
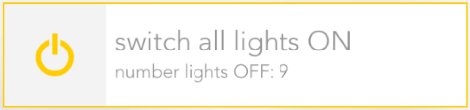
Group Functions
The group function can vary from app to app, but is mainly used to create new elements or to operate several available elements. Taking the app “lights” as an example, it can be used to switch all available lights on or off. In other cases, such as “user”, you can add new users.
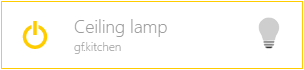
Elements
This display represents a single element in the app. In the case of “lights” every single one of your connected lights is displayed like this. The display is divided into several individual sections, each one serving a different purpose. The area on the left contains operating elements in the form of one or more buttons that you can use to control the element (e.g. light on/off). Then there is a text area containing information such as the name and the allocated area. On the right, many apps have a status display showing you the current status of the element. Fo lights, you can see whether the light is on or off, or (if the energy saving mode is active) when the light will be switched off.
Clicking /pressing the text area of an element opens the settings screen where you can change the app name, allocated areas and functions as you wish.
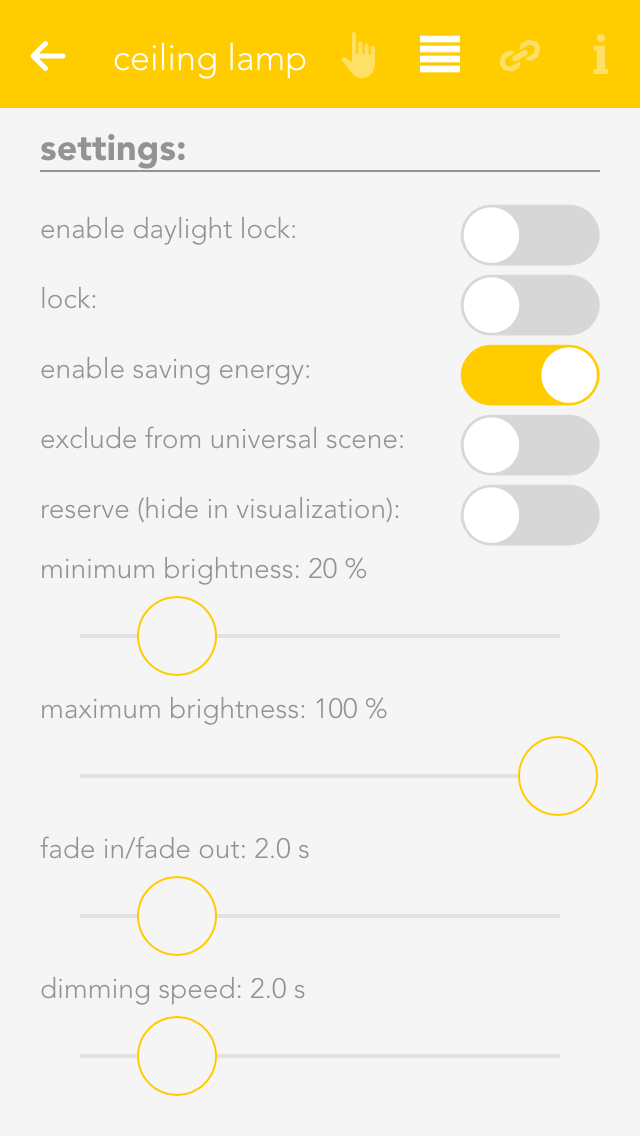
Settings
This display offers you various information and settings possibilities for the selected element and is divided into several sections. On the top right are small buttons that let you jump into other areas. The first section contains the most important operating elements via which you can operate the selected element and, depending on the app, various items of basic information.
The second section contains the settings that you can change for that element. These allow you to change the behaviour of individual element to suit your needs.
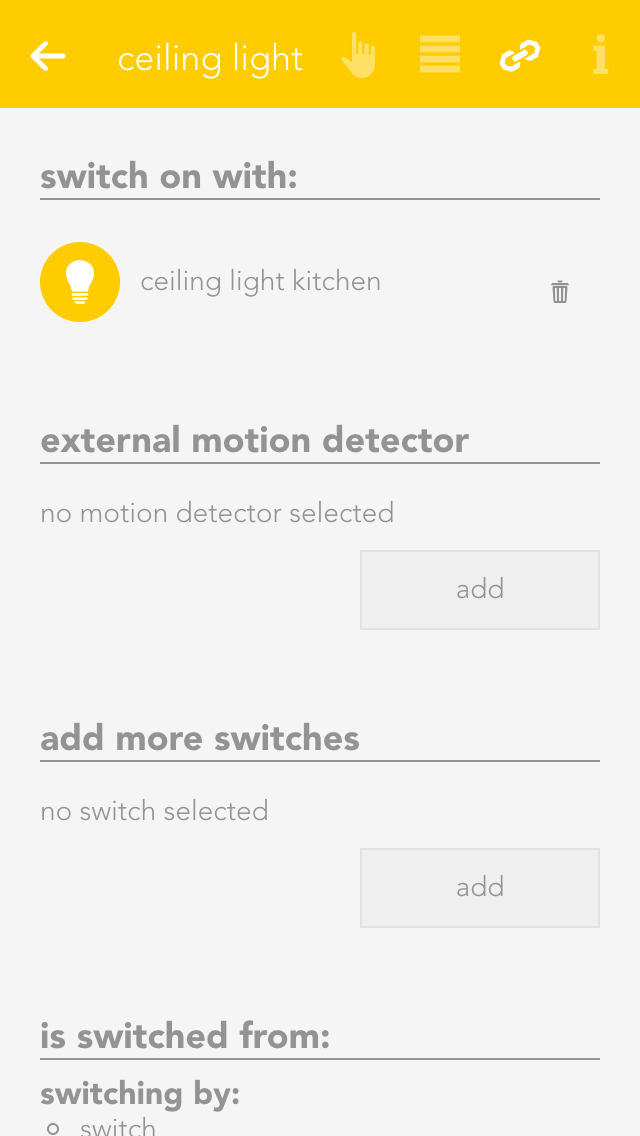
This section shows you al the links for your element. This gives you an overview, should you desire it, of which switches or functions affect the element. You can also link the element with other elements, depending on the app. For example, in the app “lights”, you have the possibility to link a light with a motion sensor.
In the settings view, most of the apps have a button on the top right allowing you to access the official documentation.
Please note that the settings possibilities vary from app to app and therefore not all sections are available for all apps.
Element selektieren
Durch langes Klicken auf ein Element wird dieses ausgewählt und es können je nach Element-Typ folgende Funktionen verfügbar sein:
Größe ändern: Passt die Größe des Element-Symbols an.
Zum Start hinzufügen: Das Element wird am Startbildschirm im Favoritenbereich angeheftet.
Duplizieren: Das Element wird innerhalb des Bereichs dupliziert.