General
The Smart Building Automation system can be controlled conventionally using the pushbuttons installed on the wall or via a PC, tablet, or smartphone. This provides convenient access to the system and its functions both at home and while on the go.
Connecting
In order to be able to control your home via the app, your must first connect to your system. Simply follow these simple steps.
WiFi Connection
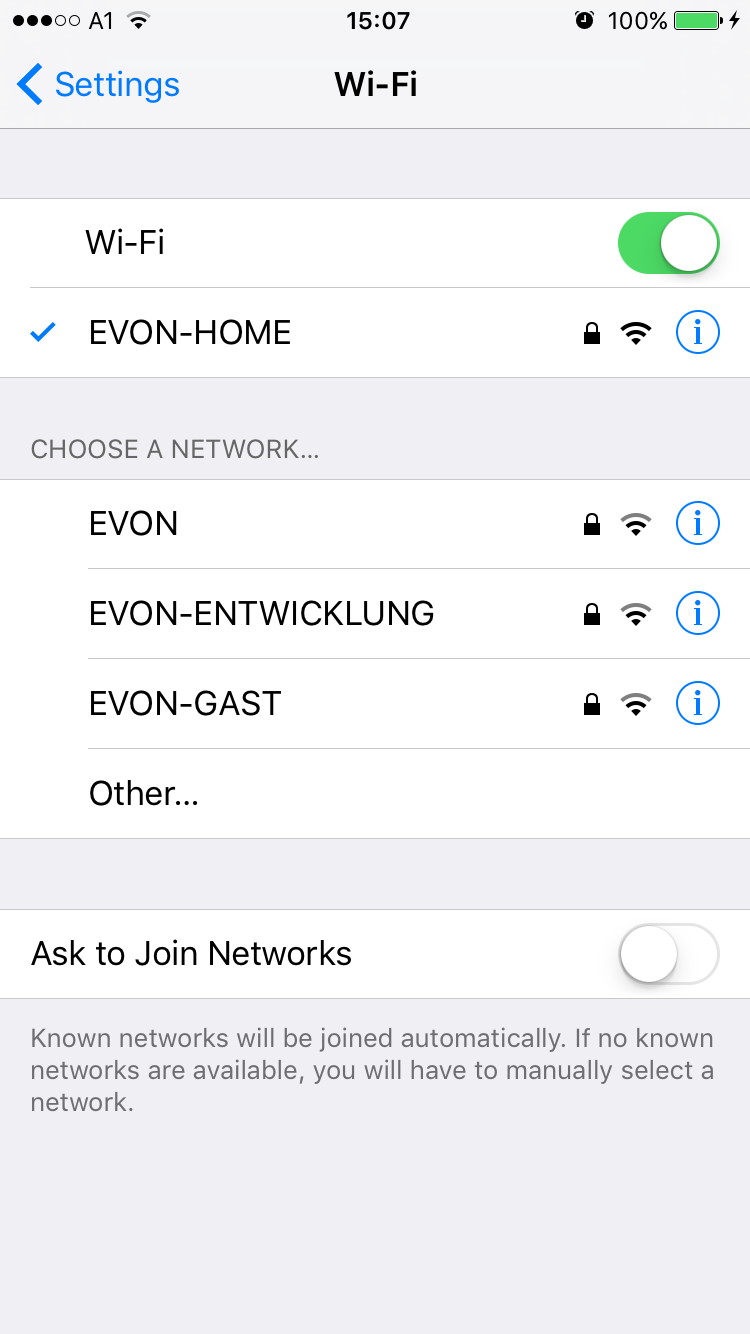
Before opening the Smart Building Automation app, make sure that your device is connected to the same network as the Smart Building Automation controller. Open the Wi-Fi settings on your device and check the currently selected network or connect to the correct one.
When the Smart Building Automation controller is started for the first time and does not receive a valid IP address via DHCP after several attempts, it automatically switches to the following static network configuration:
IP address: 192.168.50.50
Subnet mask: 255.255.0.0
When using a Wi-Fi dongle to connect to the Smart Building Automation system, the controller always uses the IP address 192.168.192.1.
Home Screen
After the app has been successfully installed from the App Store, it can be opened from the home screen. After a short loading time, the start page of the app is displayed.
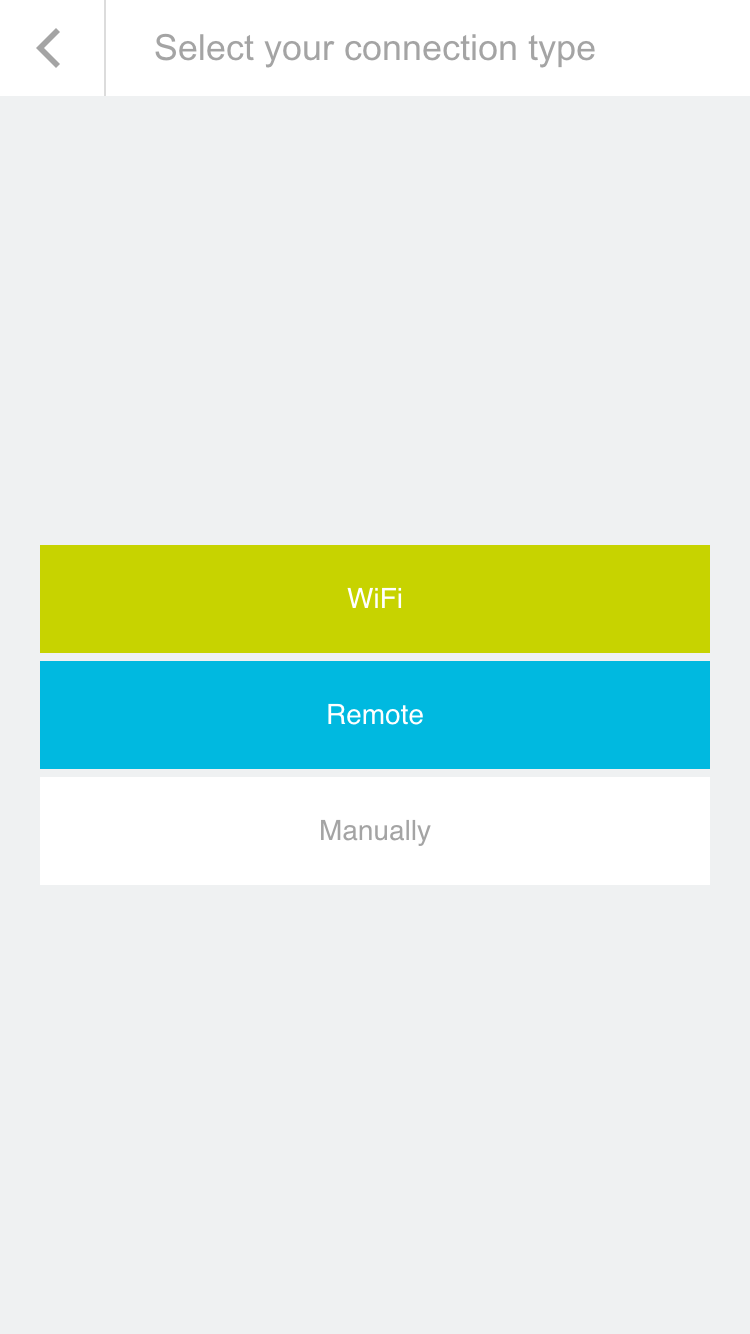
From here, available Smart Building Automation systems can be searched for. The connection can be established either via the local Wi-Fi network or via the internet (e.g. using a mobile network connection via secure HTTPS).
When setting up the Smart Building Automation system for the first time, select "Wi-Fi" to search for the system on the local network.
Start Search
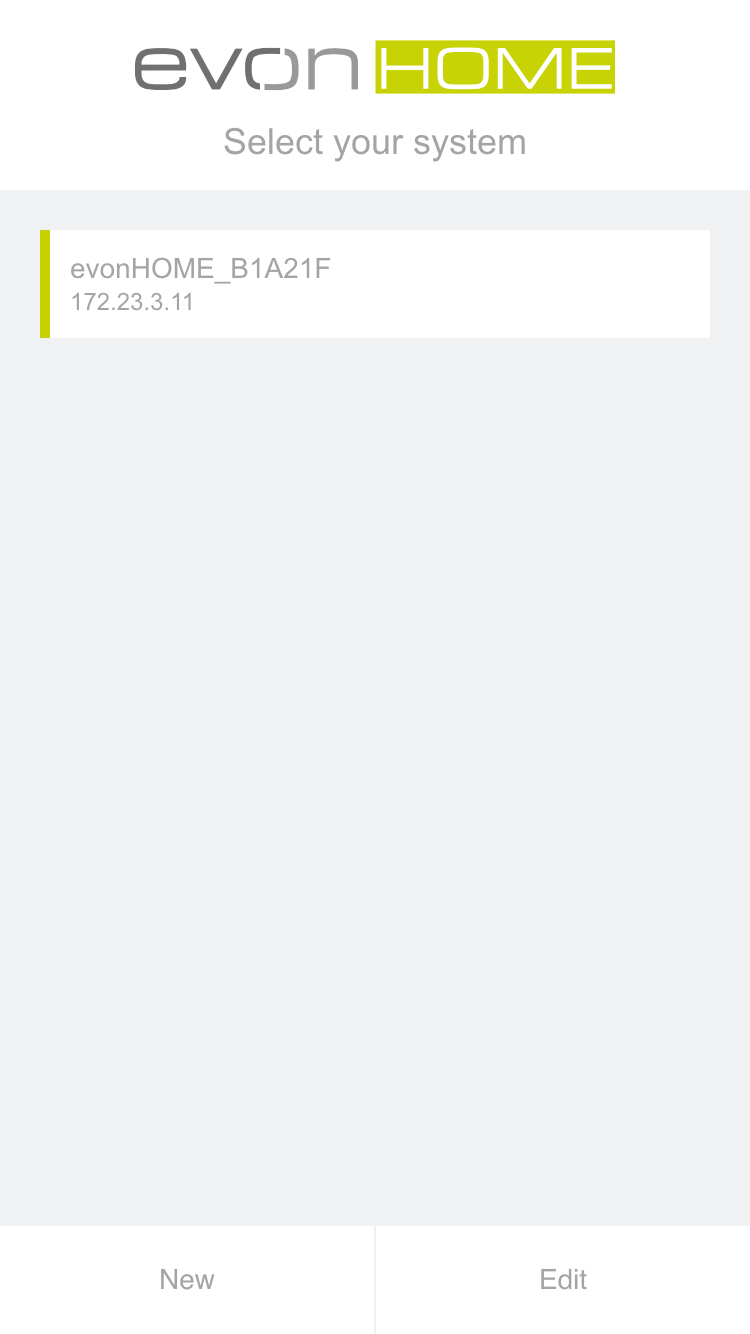
The Smart Building Automation app now searches for available systems in the network. As soon as one or more systems are found, they are displayed together with their assigned IP addresses.
A new system is initially displayed with its default name, consisting of "Smart Building Automation" and a unique identification number (e.g. "Smart Building Automation_1234AB9"). The system name can be changed later.
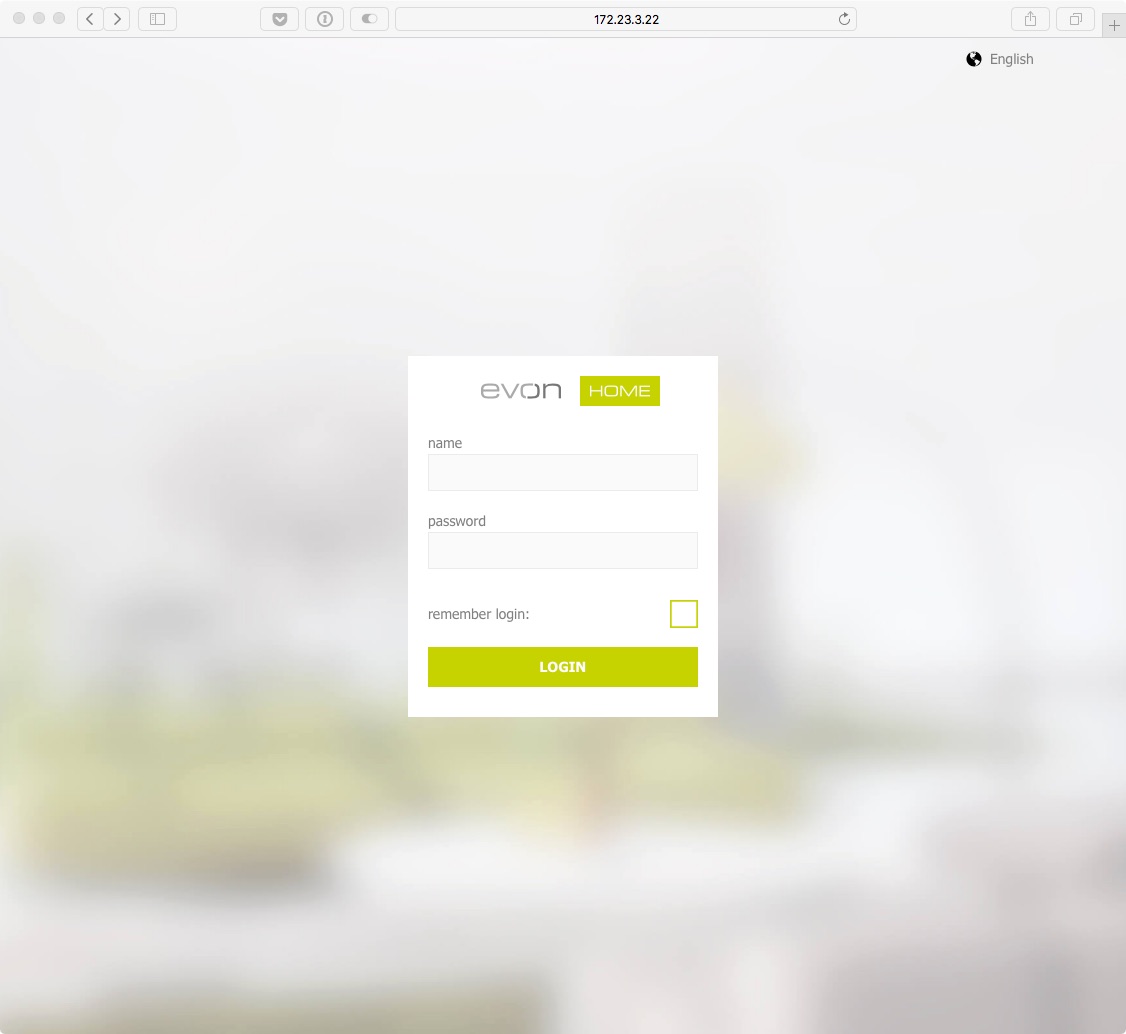
After selecting the Smart Building Automation system, the login page is displayed.
Login
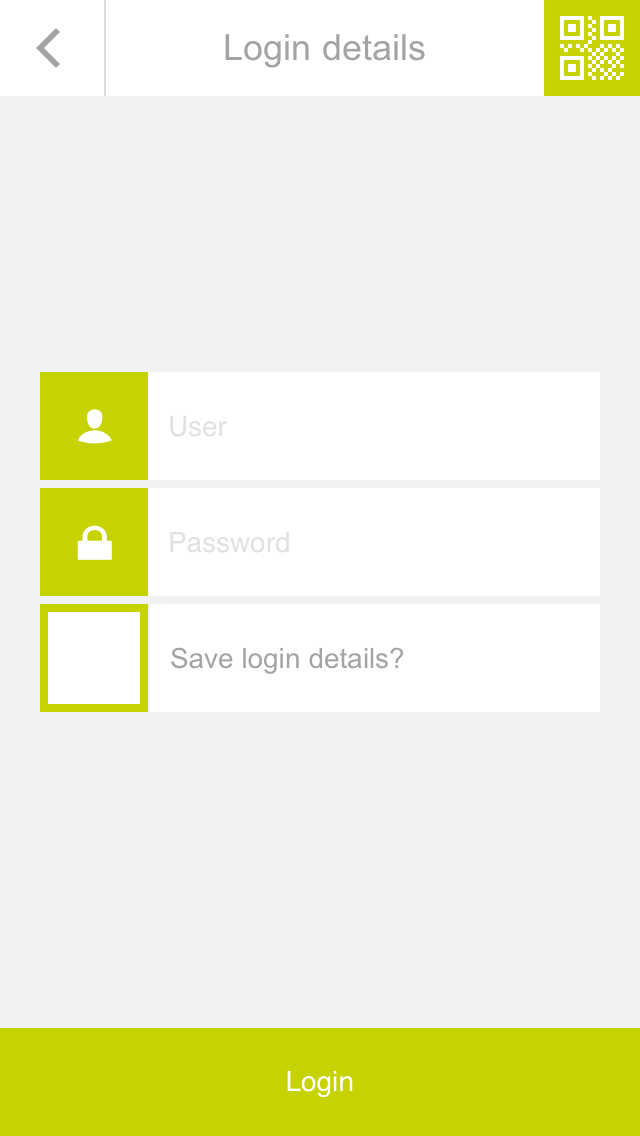
After selecting the Smart Building Automation system, the login page is displayed.
Enter the username and password. Automatic login can also be enabled to use the stored credentials for future logins.
For easier login during the initial setup of the Smart Building Automation system, a QR code can also be used. Select the green button in the upper-right corner of the login screen to use this function.
Point the camera at the QR code provided in the enclosed documentation and position it in the center of the marked area. Once the QR code has been successfully recognized, the corresponding login fields are filled in automatically.
After successful login, the connection to the Smart Building Automation system is established and the system can be operated via the app.
For the initial login, use the username and password or the QR code provided in the enclosed documentation.
Browser
In addition to accessing the Smart Building Automation system via the official app, it can also be accessed using any modern browser (e.g. Chrome, Safari, or Edge). The IP address of the system is required and is displayed in the app once the system has been found.
Enter the IP address in the browser's address bar to open the login page. After entering the credentials, the Smart Building Automation system can be operated directly in the browser.
When accessing the Smart Building Automation system via a browser, some device-specific functions of the mobile app may not be available. These include native notifications, which can also be displayed when the app is not currently in use.
Grundeinstellungen
Diese Grundfunktionen sind bei jeder Installation erforderlich und sorgen dafür, dass das System korrekt funktioniert und betrieben werden kann. Alle weiteren Einstellungen oder Funktionen hängen von den eingesetzten Komponenten ab und werden entsprechend separat konfiguriert.
Systemzeit überprüfen
Prüfen, ob die Systemzeit korrekt gesetzt ist, damit Funktionen wie Zeitpläne zuverlässig arbeiten. Mehr Details findest du über den zugehörigen Link.
Link zu den Zeit-Einstellungen
Updatestatus überprüfen
Sicherstellen, dass das System auf dem aktuellen Stand ist und wichtige Verbesserungen oder Sicherheitsupdates installiert sind. Weitere Informationen erhältst du über den Link.
Link zu den Zeit-Einstellungen
Bereiche / Räume erstellen
Räume und Bereiche anlegen, um Geräte sauber zu strukturieren und später leichter zuordnen zu können. Ausführlichere Hinweise findest du über den Link.
Link zu den Zeit-Einstellungen
Naming
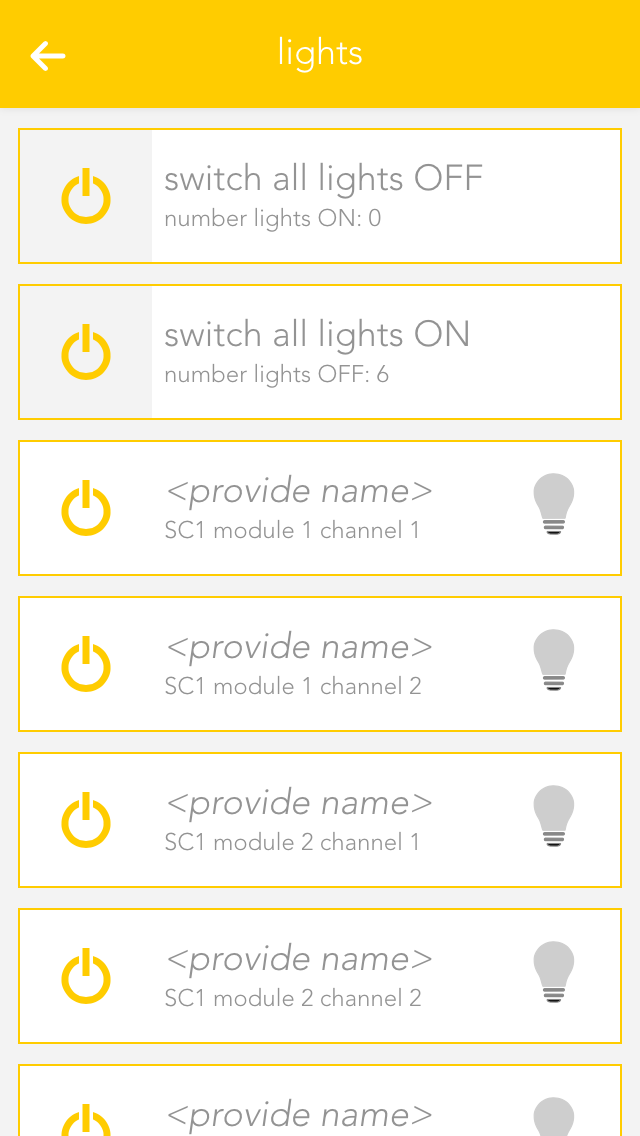
After connecting to the Smart Building Automation system via the app, all connected elements (lights, blinds, heating circuits, etc.) should be assigned a name and a room. This makes the elements easier to find and operate and also provides access to additional functions.
Select
Open "Lights", "Blinds", or "Room Climate", depending on which elements are to be configured.
The app displays a list of central functions followed by the individual elements. These elements correspond to the channels of the Smart Building Automation modules. Further information about the central functions can be found in the corresponding documentation.
Select the area displaying the name and room, in this example "no name" and "no room", to open the settings for the corresponding element.
Provide Name and Room
Enter the name of the device in the field “name”. You can type any name in here, or use a predefined name by tapping on the small arrow.
Tap on the field to select a room. The system already has a predefined few names that you can use. If you cannot find a suitable room in the list, create one in the settings -> areas and custom rooms.
You do not need to specifically save your changes, simply tap on the arrow symbol in the menu bar.
Choose a distinctive name depending on the device and purpose like: ceiling light, ambient, radiator or wall heating.
Benutzer und Benutzergruppen
Benutzer und Gruppen anlegen oder verwalten, um Zugriffsrechte sauber zu strukturieren und Rollen im System sinnvoll zu vergeben. Weitere Details findest du über den angegebenen Link.
Link zu den Zeit-Einstellungen
Externen Zugriff einrichten
Zugriff von außerhalb konfigurieren, damit das System auch unterwegs sicher und zuverlässig erreichbar ist. Alle weiterführenden Informationen stehen im verlinkten Abschnitt.
Link zu den Zeit-Einstellungen